
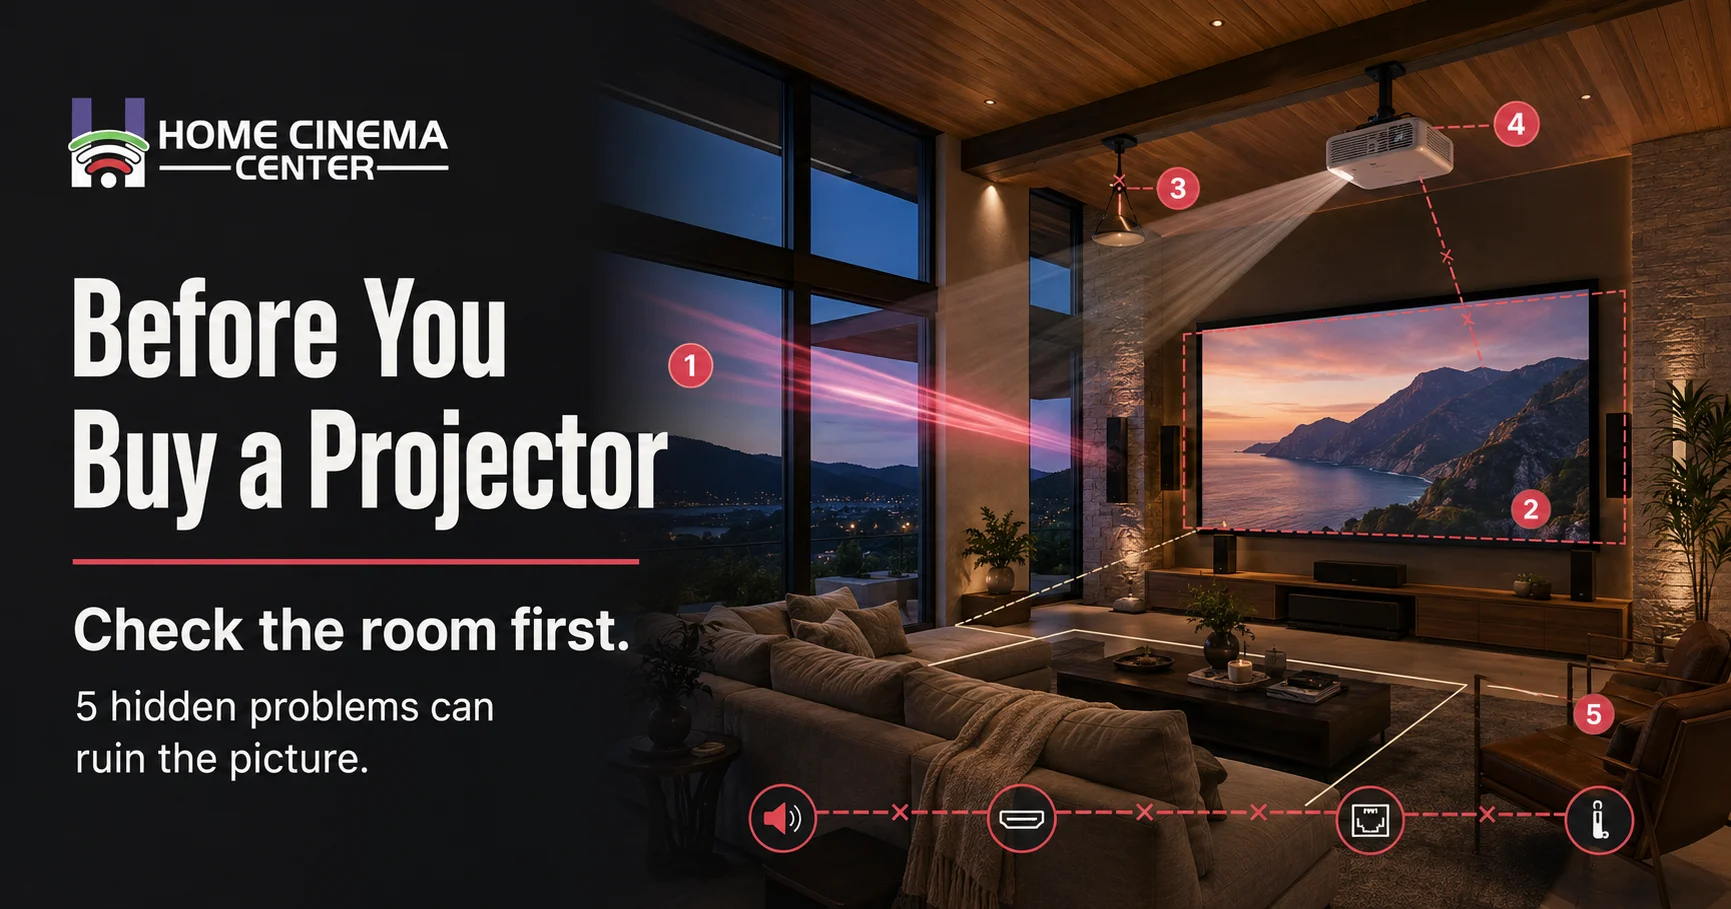
If the picture looks dull, gray, or smaller than expected, the projector may not be failing. In many homes, the real problem is the room: too much light, wrong screen size, bad throw distance, poor placement, weak sound planning, or messy wiring. A smart projector home theater setup starts with the room before the equipment.
That is the part most projector shoppers skip.
They compare 4K labels, brightness numbers, streaming apps, and sale prices. Then the projector arrives, gets pointed at a bright wall, and the dream starts leaking air. The movie looks washed out. The sound feels thin. The cables show. The fan sits too close. Someone says, “Maybe we bought the wrong projector.”
Maybe. But often, the projector was asked to solve a room problem it was never designed to fix.
Key Takeaways
- Light control matters more than most projector specs.
- Screen size should match the seating, not the biggest wall.
- Throw distance must be measured before buying.
- Sound, wiring, Wi-Fi, and control make or break the final experience.
Projector Home Theater Setup: The Short Answer
A projector works best when the room is planned first. Before buying, check five things: light, screen size, throw distance, placement, and system planning. If those are wrong, even a premium projector can feel disappointing.
That is why home theater installation is not just about hanging a projector and screen. The better work happens before that: measuring the room, checking the light, planning the screen, hiding the wiring, shaping the sound, and making the whole system easy to use.

Problem 1: Your Room Has Too Much Ambient Light
Sometimes the best projector upgrade is not a better projector. It is blocking the light that ruins the picture before the movie starts.
Projectors create an image by throwing light onto a screen. If daylight, ceiling lights, or window glare hit that same screen, the image loses contrast. Blacks turn gray. Colors look tired. The picture may still be large, but it no longer feels cinematic.
This is the hidden cause behind many searches for “why does my projector look washed out.” The room is washing out the picture.
A quick test helps:
- Look at the screen wall during the brightest time of day.
- Turn on the room lights you normally use.
- Check window glare, ceiling reflections, and light-colored walls.
- Ask whether the room is used mostly at night or during the day.
If the room is bright, a stronger projector may help, but it is not the whole answer. The setup may need darker surfaces, better light control, or an ambient light rejecting screen. In some rooms, motorized shades do more for the picture than another round of projector shopping.
Here is the blunt version: a projector cannot beat the sun with confidence. It needs the room on its side.

Problem 2: The Screen Size Is Wrong for the Seats
Bigger sounds better until the room starts fighting back.
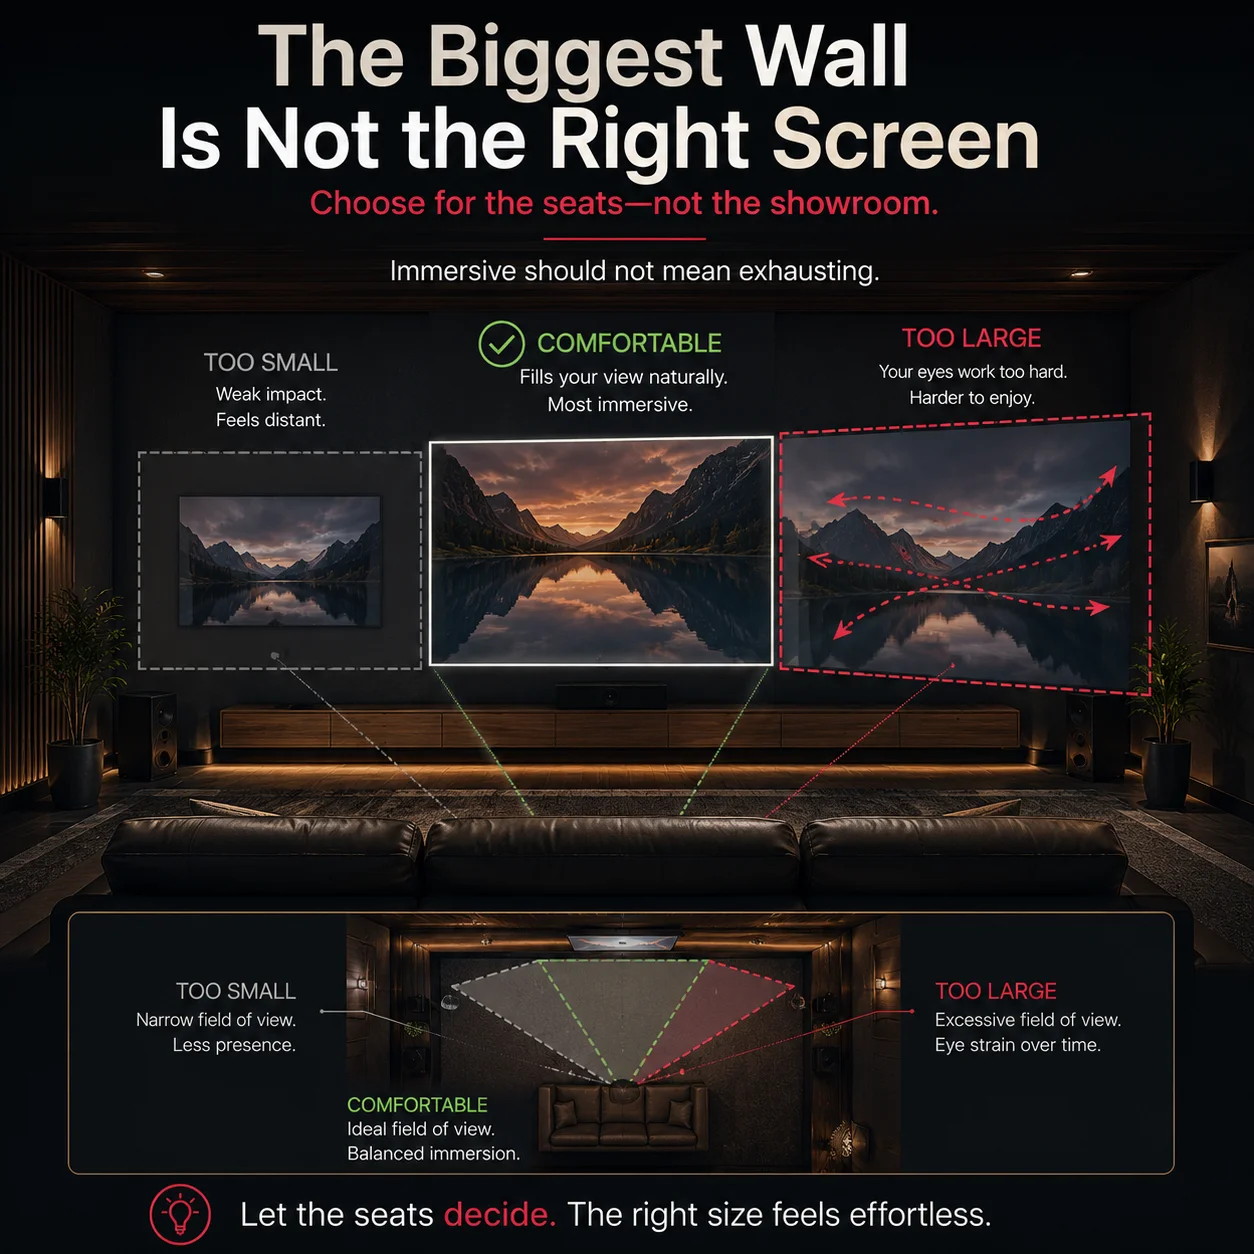
A 120-inch screen can feel incredible in the right space. In the wrong space, it can feel like sitting in the front row at a tennis match. Too small, and the projector loses its reason for being. Too large, and the picture becomes tiring.
Projector screen size should come from the seating distance, room width, and viewing comfort. Not ego. Not the biggest empty wall. Not the size someone saw in a showroom.
THX recommends a 36-degree viewing angle from the farthest seat for screen placement, which is a useful reminder that image size and seating should be planned together, not guessed separately.
A simple rule works for most homeowners: the screen should feel immersive without making the viewer work. If the eyes are constantly moving across the image, the screen may be too large. If the image feels like a distant rectangle, it may be too small.
The best home theater projector setup feels natural. Nobody should be thinking about the screen size once the movie starts.
Problem 3: The Throw Distance Does Not Fit the Room
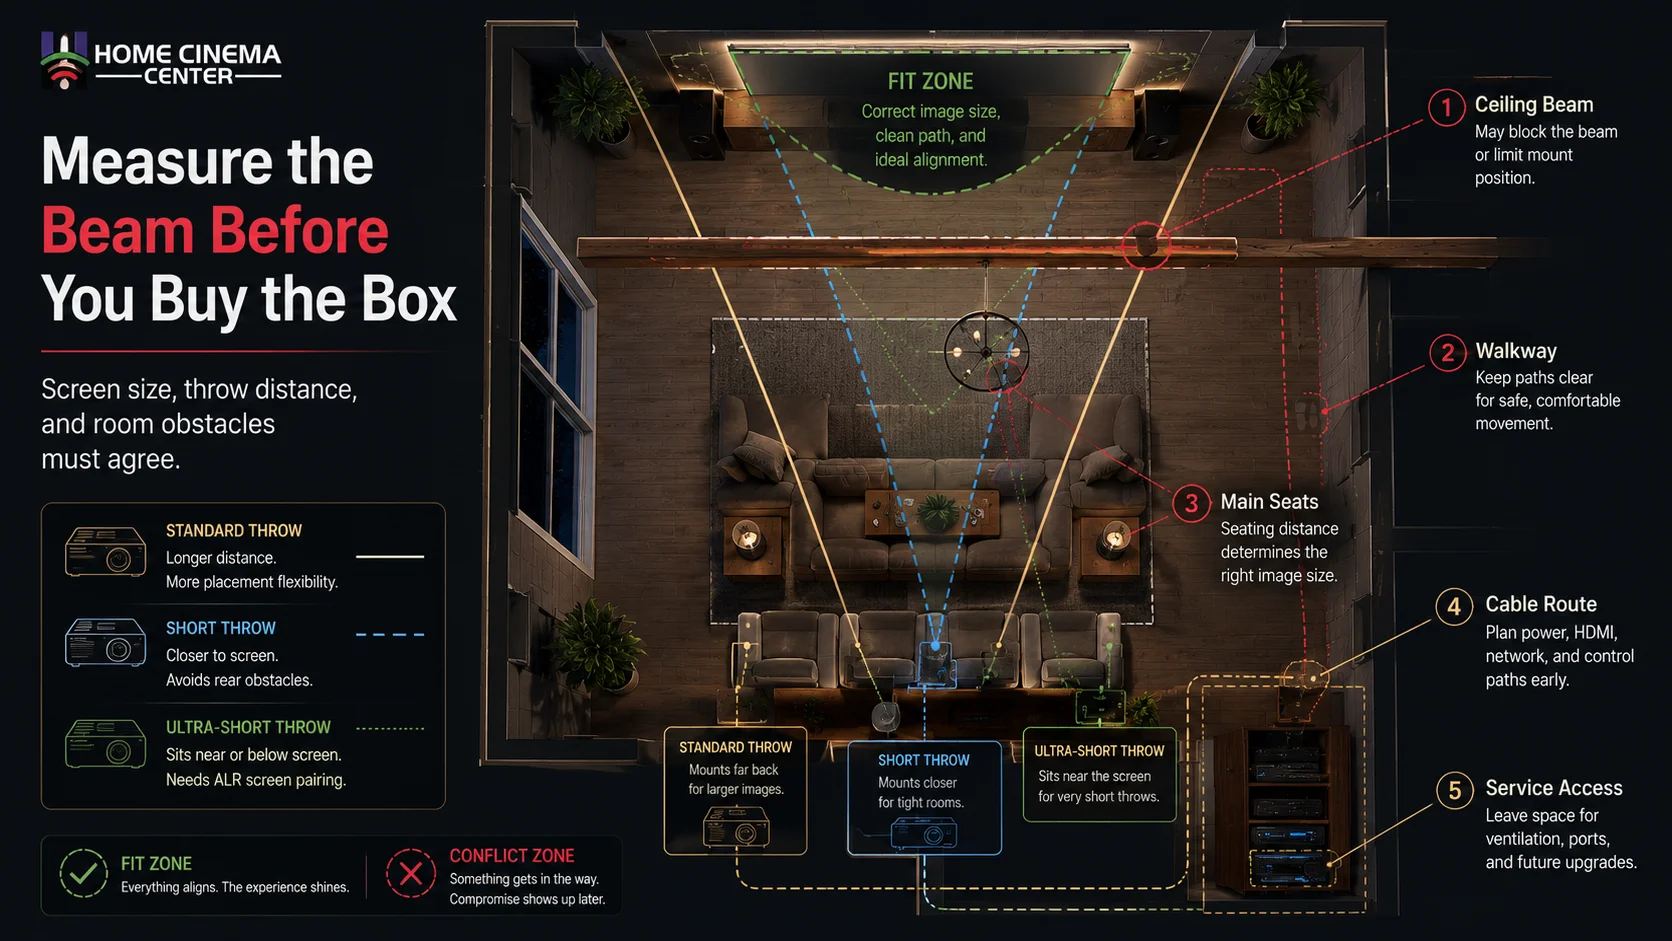
Throw distance is the distance between the projector lens and the screen. It decides how large the image can be from a specific location.
This is where many projector purchases go wrong.
A homeowner picks a projector, imagines a screen size, then later discovers the projector needs to sit where a ceiling beam, sofa, walkway, or light fixture already lives. Now the setup needs compromise before it even begins.
There are three common projector placement categories:
- Long throw projectors usually sit farther back.
- Short throw projectors sit closer to the screen.
- Ultra short throw projectors sit very close to the screen, usually below it.
None of these is automatically best. The right one depends on the room.
A long throw projector can be excellent in a dedicated theater with proper ceiling mounting. A short throw projector can help in tighter rooms. An ultra short throw projector can work well in some living rooms, but it needs careful screen pairing and very precise placement.
Before buying, measure the room. Check the projector throw distance. Confirm the screen size. Then buy.
Not the other way around.
Problem 4: The Projector Placement Fights the Picture
A projector does not just need a place to sit. It needs the right angle, height, distance, ventilation, power, and cable path.
When placement is wrong, people often rely on digital correction to force the image into shape. That may make the picture rectangular, but it can reduce clarity and create a less polished result. For a fixed projector installation, physical alignment is almost always the cleaner answer.
Good projector placement should be:
- Straight to the screen
- Stable
- Properly ventilated
- Away from seating distractions
- Reachable for service
- Planned around safe power and cable routing
That last point matters. A ceiling mounted projector setup can look beautiful, but it still needs power, HDMI, control wiring, and service access. If those are added after the fact, the room can end up with exposed cables, awkward conduit, or a projector that is annoying to maintain.
This is where clean cable management becomes part of the picture quality. Not because cables change the pixels, but because visible clutter makes expensive technology feel unfinished.
The Room-First Projector Check
| Room issue | What it causes | Smart fix | Common mistake |
| Too much light | Washed-out image | Control windows, lights, and screen material | Buying only for brightness |
| Wrong screen size | Eye strain or weak impact | Match screen to seating distance | Choosing the biggest wall |
| Bad throw distance | Awkward mount or wrong image size | Measure before buying | Assuming any projector fits |
| Poor placement | Soft image or messy install | Align projector physically | Relying on digital correction |
| No system plan | Weak sound, exposed wires, confusing controls | Plan audio, network, wiring, and control together | Treating the projector as the whole theater |
Problem 5: There Is No Plan for Sound, Wiring, Wi-Fi, or Control
The projector is only the picture.
That sounds obvious, but it is the reason many projector setups disappoint. The image may be large, but the sound comes from the wrong place. The streaming device buffers. The HDMI cable is visible. The projector remote controls one thing, the sound remote controls another, and the lights require a third app.
That is not a home theater. That is a group project.
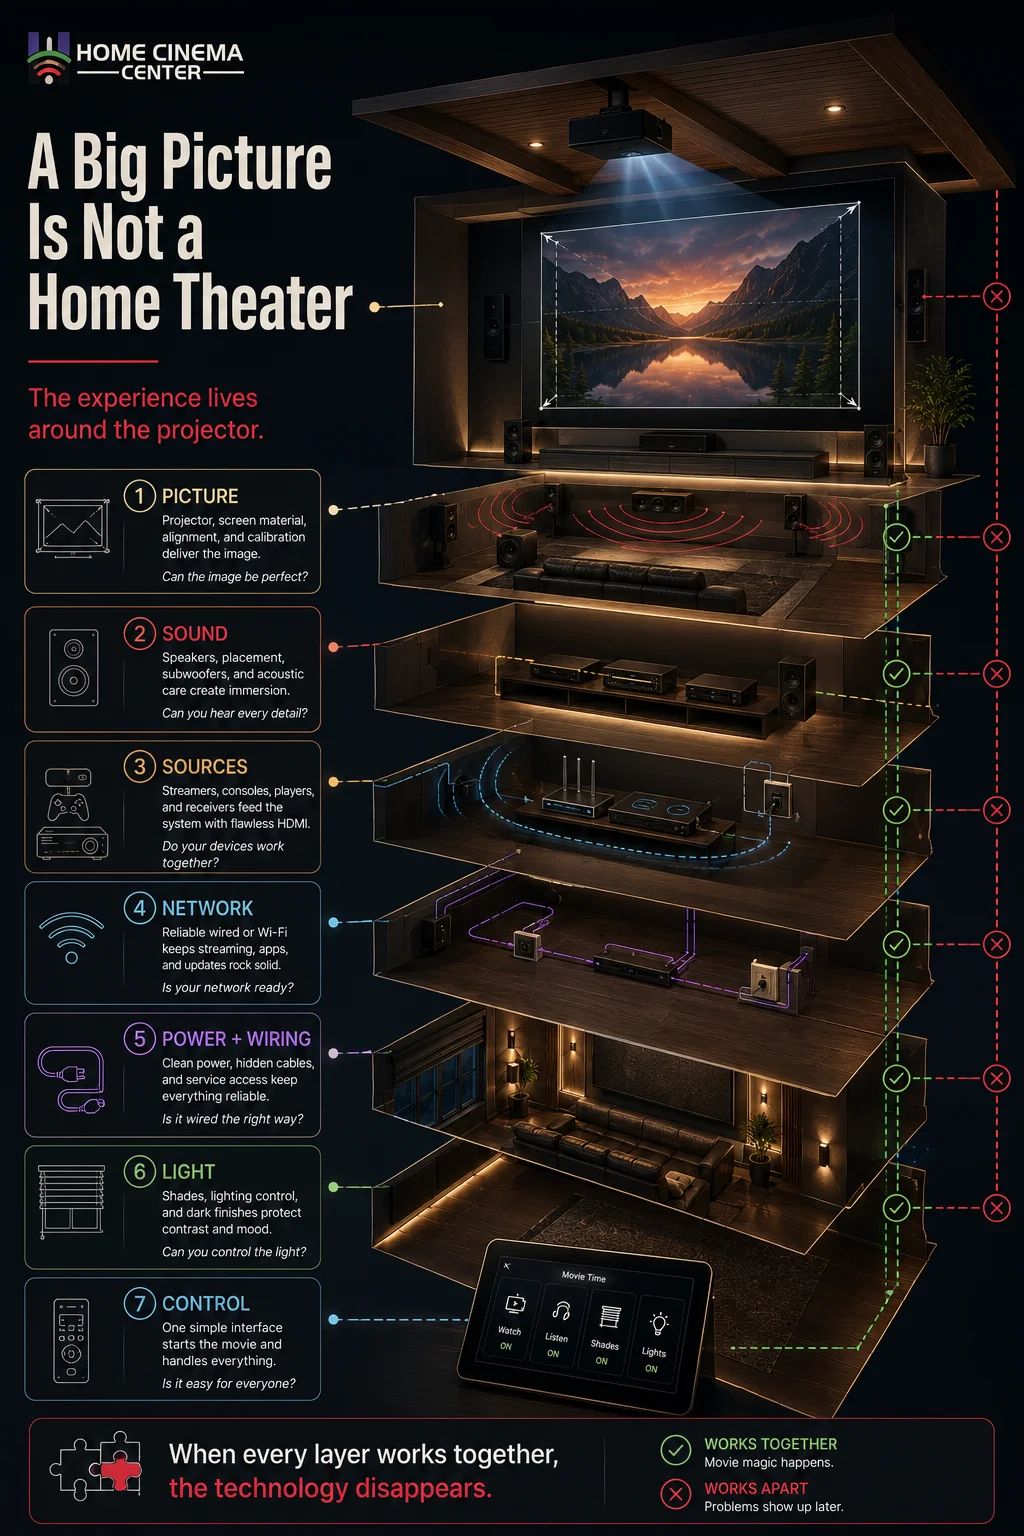
A real projector home theater setup needs:
- Projector screen setup
- Surround sound planning
- HDMI and eARC strategy
- Reliable streaming connection
- Hidden or planned wiring
- Power placement
- Equipment ventilation
- Lighting control
- Simple everyday control
For streaming, gaming, smart controls, and whole-home systems, home network installation can be just as important as the projector itself. Most smart-home problems are network problems wearing a different costume. When the movie buffers, the app freezes, or the audio drops, the projector often gets blamed for a problem happening upstream.
And if the room includes lighting scenes, shades, audio, and multiple sources, smart home automation can turn movie night from a remote-control scavenger hunt into one simple routine.
Can a Projector Work in a Living Room?
Yes, a projector can work in a living room. But the living room has to be honest.
Living rooms often have big windows, pale walls, open layouts, reflective surfaces, fireplaces, and seating that was chosen for conversation rather than screen geometry. That does not mean a projector is wrong. It means the setup needs a room-first plan.
A projector setup for living room use usually needs:
- Stronger light control
- The right screen material
- A realistic screen size
- Careful projector placement
- Better audio planning
- Clean wiring
- Reliable Wi-Fi or wired networking
If the room is used mostly at night, the projector has an easier job. If the family wants sports on a sunny afternoon, the room needs more help.
Sometimes the best answer is a projector. Sometimes it is a large TV. Sometimes it is both. A good plan does not force one answer. It reads the room.
Projector vs TV for Home Theater: Which One Fits Better?
A projector usually wins when the goal is a large, cinematic image in a room where light can be controlled. A TV usually wins when the room is bright, casual, and used heavily during the day.
The question is not “Which is better?” The question is “Which one fits the room?”

Choose a projector when:
- The room can get dark
- The desired image is very large
- Seating distance supports a big screen
- The installation can be planned cleanly
- Movie-night experience matters most
Choose a TV when:
- The room is bright most of the day
- Sports and casual viewing matter more
- Windows are hard to control
- The layout does not support throw distance
- The homeowner wants simpler placement
A projector can feel magical. But when the room is wrong, a projector can also make premium technology feel strangely cheap.
What Most People Get Wrong Before Buying
Most shoppers overvalue the spec sheet and undervalue the room.
They chase 4K before checking brightness. They compare features before measuring throw distance. They get excited about built-in apps before planning sound. They choose screen size before checking seating. They assume the wall is good enough because it is blank.
The room always has the final vote.
Do this:
- Measure the space first.
- Check light at the time the room is used.
- Choose screen size based on seating.
- Confirm throw distance before buying.
- Plan sound, wiring, network, and control early.
- Use qualified help for electrical work, ceiling power, or in-wall wiring when required.
Not that:
- Do not buy only because the box says 4K.
- Do not assume a white wall equals a screen.
- Do not mount first and solve wiring later.
- Do not ignore projector fan noise near seating.
- Do not rely on built-in speakers for a theater experience.
- Do not treat the projector as the entire system.
Electrical work, ceiling power, hidden wiring, and low-voltage cabling may involve local building code, safety standards, or a licensed electrician. A clean setup should not create a hidden problem.
A Familiar Marin County Room Problem
Picture a bright great room in Marin County. Tall windows. Pale walls. Open kitchen. Beautiful view. The homeowner wants a big projector image for movies, sports, and family nights.
The projector choice looks simple online. In the room, the story changes.
Daylight hits the screen wall from the side. The best ceiling mount location is not centered. The seating is closer than expected. Wi-Fi is weaker near the media cabinet. The family wants clean walls, no exposed wires, and one easy way to start everything.
The better solution is not to force the first projector into the room. The better solution is to diagnose the room.
Maybe the screen size changes. Maybe the room needs window shades. Maybe the projector fits better in a darker media room. Maybe an ultra-short throw setup works better. Maybe a large TV is smarter for daytime viewing, and the projector belongs somewhere else.
That is the difference between buying equipment and designing an experience.
When DIY Is Enough
DIY can be enough when the room is simple.
A beginner projector setup may work well if:
- The room is mostly dark during viewing
- The projector can sit in the right location
- The screen size is modest
- The wiring can stay simple
- The sound system is basic
- The homeowner is comfortable with alignment and settings
There is nothing wrong with a simple projector setup. Some rooms make it easy.
But when the goal is clean, premium, reliable, and built around the room, the job becomes less about plugging in a projector and more about design.
When to Call a Professional
Call a professional when the room has consequences.
That includes finished ceilings, bright living rooms, large open spaces, fireplaces, hidden wiring, surround sound, network-dependent streaming, motorized shades, multiple sources, or a setup that needs to look clean from every angle.
A professional home theater installer should look at:
- Light control
- Screen size and material
- Throw distance
- Mounting location
- Sound layout
- Cable paths
- Power placement
- Network reliability
- Equipment access
- Everyday control
For local homeowners, projector installation can be especially valuable in older homes, remodeled spaces, hillside properties, bright living rooms, and finished walls where one wrong assumption can become an expensive patch.
The best question is not, “Which projector should we buy?”
The better question is, “Can this room support the experience we want?”
Conclusion: Buy the Room Plan Before the Projector
The projector is not always the problem. The room may be fighting the picture.
Before buying, check the light, screen size, throw distance, placement, sound, wiring, Wi-Fi, and control. That is how a projector becomes a theater instead of another expensive device that almost works.
A strong projector home theater setup starts with a simple idea: the room comes first. The equipment should follow.

Want the clean version of this setup? Visit Home Cinema Center or call 415 897 6217 or 415-892-5509. For questions, email info@homecinemamarin.com.
FAQ
How do you set up a projector home theater?
Start by checking room light, seating distance, screen size, throw distance, projector placement, sound, wiring, and control. Choose the projector after the room plan is clear.
Is a projector home theater setup for beginners difficult?
It can be simple in a dark room with easy placement and basic sound. It becomes harder when the setup needs hidden wiring, ceiling mounting, lighting control, or surround sound.
Can I use a projector in my living room?
Yes, but a living room needs honest planning. Bright windows, pale walls, open layouts, and weak light control can make the picture look washed out.
What size projector screen do I need?
The right screen size depends on seating distance, room width, viewing comfort, and projector throw distance. Bigger is not always better if the seats are too close.
How far should a projector be from the screen?
That depends on the projector’s throw ratio and the screen size. Measure the room before buying so the projector can create the image size you want from a practical location.
Why does my projector look washed out?
The most common cause is ambient light. Daylight, ceiling lights, reflective walls, or the wrong screen material can reduce contrast and make blacks look gray.
Is a projector better than a TV for home theater?
A projector is better for a large cinematic image in a controlled room. A TV is usually better for bright rooms, daytime viewing, and simpler everyday use.
Do projectors need calibration?
Yes, many projectors benefit from calibration. Focus, alignment, brightness, contrast, color, and audio timing can all affect how polished the system feels.
Can Home Cinema Center help before a projector is purchased?
Yes. The smartest time to ask for help is before buying, so the room, screen size, throw distance, wiring, sound, and controls can be planned correctly.
Does Home Cinema Center handle projector setup in Novato and Marin County?
Yes. Local service can help with room planning, projector placement, screen setup, wiring, sound, network planning, and clean installation for Novato, Marin County, and nearby Bay Area homes.


