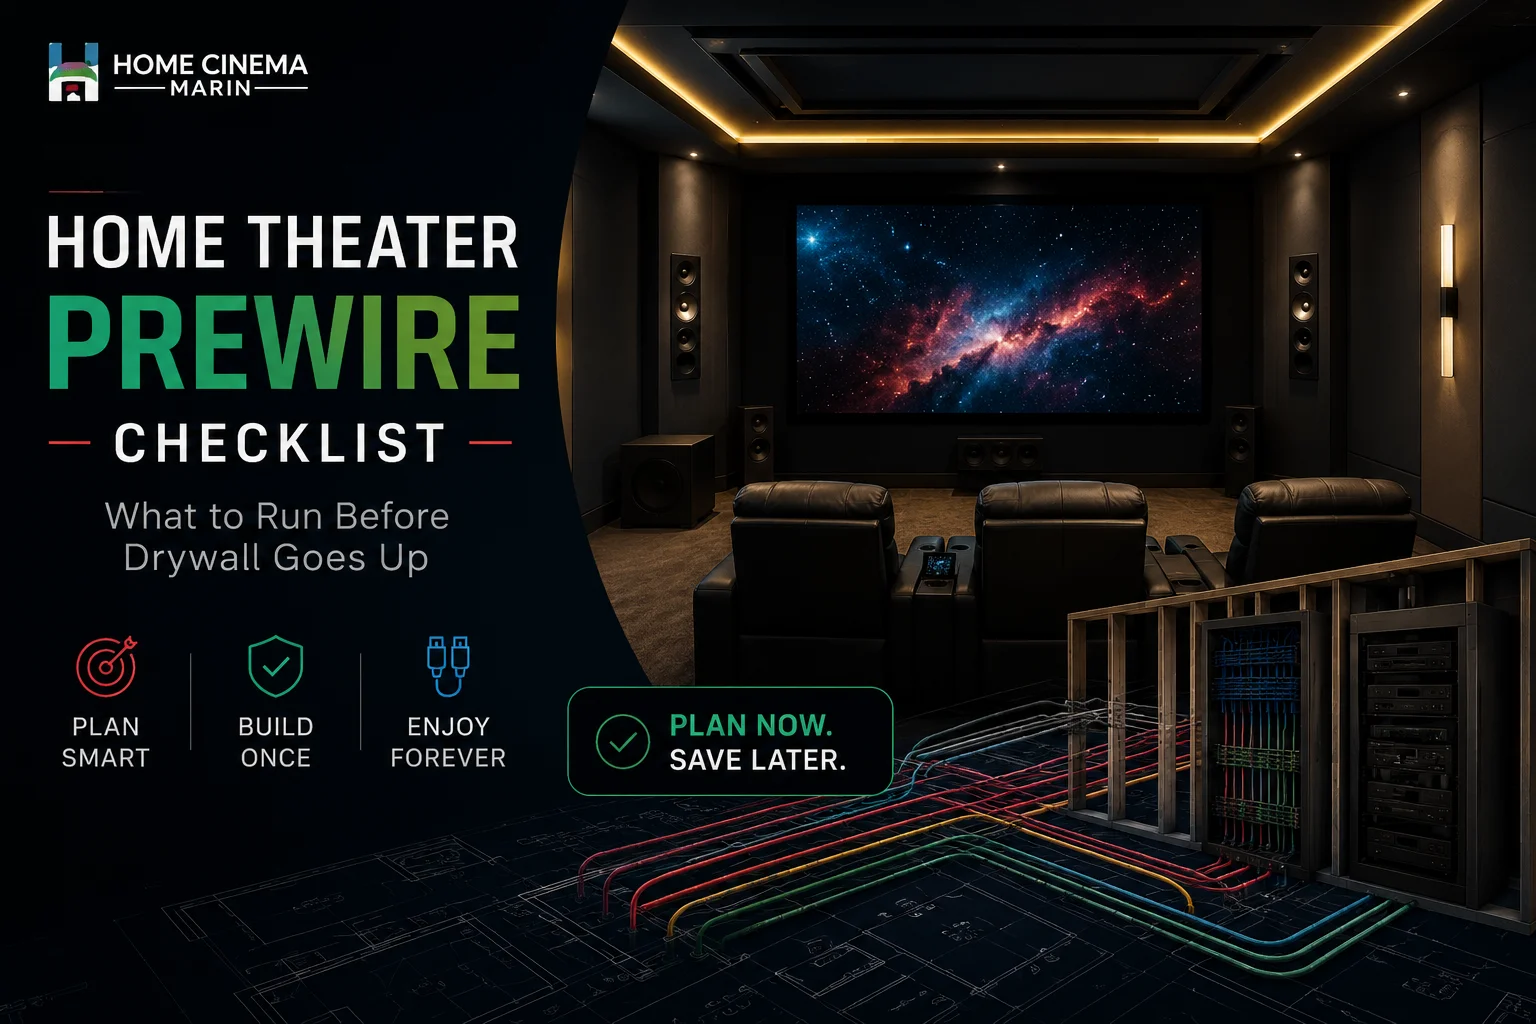
Before drywall goes up, run every cable and pathway your theater may need for speakers, subwoofers, the display or projector, Ethernet, control, and the equipment rack. The bigger mistake is planning wires before seating and screen positions are fixed. Those two choices decide where almost everything else belongs.
That is the truth about home theater prewire.
The expensive mistake is usually not forgetting one fancy cable. It is letting the walls close before anyone has designed the room as a complete system.
Once you can no longer see the studs, every change gets harder.
At Home Cinema Center, home theater planning covers the complete system, from display and speaker placement to wiring, networking, control, installation, and calibration. That matters during construction because the best time to solve these problems is before the room looks finished.
Key Takeaways
- Fix the seating and screen location before running speaker wire.
- Run Ethernet and conduit even when the current equipment can work wirelessly.
- Give subwoofers, Atmos speakers, and future displays more than one option where practical.
- Photograph, label, and test every run before drywall hides it.
What Should You Prewire for a Home Theater Before Drywall?

A home theater prewire should normally account for speakers, subwoofers, the TV or projector, Ethernet, equipment-rack connections, control systems, electrical locations, lighting, and future cable paths.
But do not begin by buying cable.
Begin by answering four questions:
- Where will people actually sit?
- Where will the picture be?
- Where will the speakers need to be relative to those seats?
- Where will the electronics live?
If those decisions are still moving, your wiring plan is still moving too.
This is where many projects go wrong.
Someone walks through the framed room and says, “Put speaker wire here, here, and here.”
Six months later, the sofa moves 30 inches, the screen gets larger, the projector position changes, and those carefully hidden wires are now carefully hidden in the wrong places.
The PREWIRE Rule: Plan the Room Before You Plan the Cable
Use this simple order:
P: Picture and seating
R: Rack location
E: Ethernet and network
W: Wire for every planned speaker
I: Infrastructure for power and control
R: Routes for replacement cables
E: Extras you may want later
Follow that order and the cable list becomes much easier.
Picture and Seating Come First
Your TV or projection screen establishes the front of the room.
Your seating establishes the listening area.
Speaker placement follows both.
Dolby’s current 7.1.4 guidance tells installers to choose a central seating point and arrange the speakers around that position. Its diagrams place front, surround, rear-surround, and overhead channels in defined relationships to the listener.
CEDIA’s RP22 guidance takes the idea further for rooms with more than one seat. It warns that overhead-speaker placement should consider the full listening area rather than only one reference chair.
So this is not an Atmos plan:
“Put four speaker wires in the ceiling.”
This is:
“We know where the seats will be, so now we know where the overhead channels belong.”
Complete Home Theater Prewire Checklist
| What to plan | Before drywall? | Why it matters |
| Screen or TV position | Yes | Sets the room orientation |
| Main seating location | Yes | Controls speaker geometry |
| Front speaker wiring | Yes | Hard to move cleanly later |
| Side/rear surrounds | Yes | Placement depends on seats |
| Atmos/height speakers | Yes | Ceiling geometry matters |
| Subwoofer locations | Yes | Bass may work better in another position |
| Projector signal path | Yes | Long cable path is difficult later |
| Display Ethernet | Yes | Useful for streaming and control |
| Rack Ethernet | Yes | AV gear depends on the network |
| Equipment rack location | Yes | Needs access and ventilation |
| Empty conduit | Yes | Gives later cables somewhere to go |
| TV/projector power | Coordinate | Must match final equipment location |
| Subwoofer power | Coordinate | Powered subs need nearby power |
| Motorized screen wiring | If planned | Difficult to add after finish work |
| Lighting control | If planned | Best coordinated during construction |
| Blocking/backing | Yes | Supports mounts and equipment |
| Cable labels | Yes | Prevents guesswork later |
| Pre-drywall photos | Yes | Shows exactly what is behind every wall |
1. Run Speaker Wire Only After You Know the Speaker Layout
Speaker wire is cheap compared with reopening a finished ceiling.
That does not mean you should scatter extra wire everywhere.
Each run should have a purpose.
A typical theater could require wiring for:
Front Left and Right Speakers
These create the main soundstage around the screen.
Their location needs to work with screen width, speaker type, room shape, and listening position.
Center Channel
The center speaker carries much of the dialogue in movies and TV.
If you are planning an acoustically transparent projection screen, the center may sit behind the screen.
If you are using a TV, the position will be different.
That choice affects the wire location.
Side Surround Speakers
These normally sit beside or somewhat behind the listening position depending on the system layout.
Do not position them by simply dividing the side wall in half.
Rear Surround Speakers
A 7-channel ear-level layout adds rear speakers behind the listener.
If you expect to move from 5.1 to 7.1 later, running the extra wire during framing may make sense even if those channels are not part of the first equipment purchase.
Dolby Atmos Speakers
This is where guessing becomes particularly expensive.
Dolby’s current setup material shows layouts including 5.1.2, 5.1.4, 7.1.2, and 7.1.4. The last number represents overhead or height speakers.
Dolby also states:
“We recommend you use professional installers who have experience with overhead speakers.”
That advice appears directly in its current 7.1.4 overhead-speaker guidance.
Why?
Because a ceiling speaker that is two feet out of place cannot be corrected with a receiver menu.
2. Prewire More Than One Possible Subwoofer Location
Your floor plan may say the subwoofer belongs beside the front cabinet.
The room may disagree.
Bass interacts heavily with room dimensions and seating position. Moving the subwoofer can change how even or uneven the low frequencies sound at the seats.
That makes prewiring two practical subwoofer locations worth discussing.
For each planned location, think about:
- Signal connection
- Electrical power
- Physical space
- Furniture placement
- Access back to the AV rack or receiver
Do not assume the subwoofer connection will always be identical. The final equipment design should determine the exact signal method.
The goal is flexibility.
It is frustrating to discover that the best acoustic location is ten feet away from the only usable cable.
3. Do Not Bury Your Entire Video Future Inside One HDMI Cable
This is one of the biggest changes from older prewire advice.
As of 2026, HDMI 2.2 is the current specification.
The HDMI Licensing Administrator states that the new Ultra96 HDMI cable supports up to 96 Gbps, while the previous Ultra High Speed HDMI cable supports system configurations up to 48 Gbps. HDMI 2.2 can support much higher combinations of resolution, refresh rate, chroma, and bit depth.
That is useful.
But it also proves the bigger point.
Cable standards change.
Your drywall should not care.
For a Wall-Mounted TV
Plan for:
- The display location
- Power
- Ethernet
- HDMI/video path
- Control requirements
- Mounting support
- Conduit where practical
Home Cinema Center already approaches home theater as a complete design-and-installation project rather than simply hanging a display. See Home Cinema Center’s home theater services
For a Projector
Think through:
- Exact projector position
- Throw distance
- Ceiling height
- Mounting support
- Power
- HDMI/video path
- Ethernet
- Control
- Conduit
- Motorized-screen wiring if applicable
Long video runs deserve extra attention because distance can change which cable technology makes sense.
The smarter approach is not:
“Which HDMI cable will last forever?”
There is no honest answer to that.
The better question is:
“Can another cable get from the rack to the projector without opening the ceiling?”
That is what conduit solves.
4. Run Conduit Where Future Cable Replacement Would Hurt
A spare conduit may look like an empty plastic tube during construction.
Later, it can become the most valuable low-voltage item in the room.
Consider conduit between:
- AV rack and TV wall
- AV rack and projector
- AV rack and projection-screen area
- Difficult ceiling locations
- Central equipment area and another major AV zone
Include a pull string.
Also think about connector size, not only cable diameter. An HDMI connector is much wider than the cable attached to it.
Tight bends and undersized conduit can turn an apparently useful pathway into something a future installer cannot actually use.
This is another area where current competitor advice has improved. Recent 2026 builder-oriented prewire guidance also places conduit and future cable paths high on the list because retrofitting through finished surfaces creates far more disruption than rough-in work.
5. Run Ethernet to the Theater Even If Your WiFi Is Excellent
Your home theater is not really an isolated AV system anymore.
It is part of your network.
Streaming boxes, televisions, receivers, control processors, game systems, media servers, projectors, and other equipment may all use network connectivity.
Home Cinema Center specifically notes that HDTVs, home theater receivers, streaming equipment, computers, Apple TV devices, audio products, and camera systems depend on reliable wired or wireless connections.
When the walls are open, fixed AV equipment is an obvious place to consider wired Ethernet.
Cat6 or Cat6A?
Do not turn this into a cable-brand argument.
Both can be appropriate depending on the project.
Current Leviton documentation states that Cat 6A supports 10 Gigabit Ethernet over a maximum 100-meter channel and up to 500 MHz bandwidth.
That does not mean every home theater needs Cat6A.
It does mean that the network cable you install behind permanent walls deserves more thought than the patch cable sitting behind your laptop.
For many new builds and major remodels, discuss Ethernet runs to:
- Display
- Projector when useful
- Equipment rack
- Streaming devices
- Control processor
- Network switch
- Nearby WiFi access point locations
WiFi is valuable.
So is not making stationary equipment compete for WiFi when a cable could have been installed before drywall.
6. Decide Where the AV Rack Will Live Before Wiring Starts
An AV rack should disappear visually.
It should not disappear physically.
Sooner or later, someone will need to reach it.
Your receiver, amplifier, network switch, control processor, streaming hardware, power equipment, and other components can create heat and require service.
A useful rack location needs:
- Enough equipment space
- Airflow
- Access
- Appropriate electrical planning
- Network connections
- Speaker-wire home runs
- Display/projector paths
- Control wiring
- Space for reasonable equipment changes
A beautiful closet that overheats the electronics is not premium design.
Neither is a rack that requires removing shelving every time an HDMI cable needs attention.
7. Coordinate Power Before the Electrician Finishes Rough-In
Your low-voltage installer and electrician should not work from two unrelated plans.
Theater equipment may need power at:
- TV location
- Projector
- Equipment rack
- Each powered subwoofer location
- Motorized projection screen
- Motorized shades
- Lighting-control components
- Other powered AV devices
Electrical requirements, circuit planning, receptacle placement, grounding, and code compliance belong with the appropriate qualified electrical professional.
The AV designer’s job is to make sure the electrician knows where the equipment will actually be.
A perfectly wired projector location is not very useful when the closest outlet is on the opposite side of the ceiling.
8. Plan the TV Mount, Projector Mount, and Screen Support While the Studs Are Visible
This part is easy to overlook because it does not look like “wiring.”
It matters just as much.
Before the walls close, identify where structural backing or blocking may be required for:
- Large TV mounts
- Articulating mounts
- Mantel mounts
- Projector brackets
- Projection screens
- In-wall speakers
- Speaker back boxes
- Other heavy equipment
Home Cinema Center also provides professional TV installation and concealed wiring, so mount location and wire concealment can be planned together rather than treated as two separate jobs later.
A wall is much easier to strengthen when you can still see inside it.
9. Do Not Forget Lighting, Shades, and Control
A theater can have expensive speakers and a beautiful display and still feel disappointing.
Sometimes the problem is not the AV equipment.
It is the room around it.
A projector cannot create convincing black levels while sunlight pours through a window.
A movie room feels less polished when you have to stand up and turn off four different lights before every film.
If lighting control, motorized shades, or whole-home automation are part of the plan, discuss them before rough-in ends.
Home Cinema Center’s URC Total Control service combines entertainment with other connected functions such as lights, thermostats, cameras, locks, and shades.
That allows a theater to behave like one system instead of five unrelated products.
10. Label Everything Like You Will Forget Everything
Because you will.
Six months after construction, a bundle of identical white cables does not look nearly as obvious as it did during rough-in.
Label both ends.
Good labels describe destinations clearly:
- Front Left
- Center
- Surround Right
- Top Front Left
- Subwoofer Rear
- Projector Ethernet
- TV Data
- Rack to Display Conduit
Then document the installation.
Before Drywall Goes Up
Take wide photos of every wall and ceiling.
Then take closer photos showing:
- Cable paths
- Stud positions
- Blocking
- Conduit
- Speaker-wire loops
- Boxes
- Rack feeds
- Projector location
Include a tape measure in important photos when useful.
A photo showing “the speaker wire is somewhere behind this wall” is less helpful than one showing that it sits 28 inches from a known corner.
The Pre-Drywall Self-Check
Before anyone hangs the first sheet of drywall, walk through the theater and answer these questions.
Picture
- Is the TV or screen size settled?
- Is its height settled?
- Is projector throw distance confirmed?
- Is mounting support installed?
Seating
- Is the main seating location fixed?
- Are additional rows accounted for?
- Do speaker positions relate to the actual seating?
Sound
- Are all ear-level channels wired?
- Are Atmos locations designed rather than guessed?
- Is there an option for future channels?
- Are there useful subwoofer alternatives?
Network
- Is Ethernet available at the rack?
- Does the display need Ethernet?
- Is the projector data-ready where useful?
- Has the wider home network been considered?
Pathways
- Can the display cable be replaced?
- Can the projector cable be replaced?
- Is there a pull string?
- Are difficult future routes covered?
Equipment
- Does the rack have enough space?
- Can heat escape?
- Can a technician reach the rear?
- Is power coordinated?
If one of those answers is “we’ll figure it out later,” figure it out now.
That is what the framing stage is for.
What Most Homeowners Get Wrong About Home Theater Prewire
Mistake #1: “We’ll Decide the Speakers Later”
You can decide the speaker model later.
Speaker location is different.
Once ceiling holes, wire paths, framing, lighting, HVAC vents, and seating are fixed, your placement options shrink.
Do this: settle the speaker layout.
Not that: scatter wire in roughly useful places.
Mistake #2: Running One HDMI Cable With No Replacement Path
The cable may work perfectly for years.
Or it may not.
The real mistake is leaving no Plan B.
Mistake #3: Assuming the Front Corner Is the Best Subwoofer Location
Furniture drawings are not acoustic measurements.
Give yourself another option where practical.
Mistake #4: Treating Ethernet as Old Technology Because Everything Has WiFi
Modern home theater products increasingly depend on the network.
Putting network infrastructure in the wall while it is open is usually much easier than trying to add it after expensive finishes are complete.
Mistake #5: Hiding the Equipment Too Well
Hidden is good.
Inaccessible is not.
The rack still needs cooling, cable access, and service space.
An Example: The Wire List That Looked Complete but Wasn’t
Imagine a new media room with a 100-inch display, Dolby Atmos audio, two seating rows, streaming, gaming, smart lighting, and a remote equipment rack.
The original rough-in note says:
“Run HDMI and surround-sound wire.”
That sounds reasonable.
Now design the actual room.
The seating position changes where the side surrounds belong.
Four overhead channels need positions based on the listening area.
The remote rack needs speaker home runs, network, video, control, and power.
The display needs Ethernet.
Two possible subwoofer positions make sense.
A conduit from the rack to the display creates a replacement path.
The lighting needs to communicate with the control system.
Blocking is needed for the display mount.
Suddenly, “HDMI and speaker wire” was not really a home theater prewire plan.
It was a partial cable list.
That difference only becomes obvious after you design the finished experience.
When Is DIY Prewiring Reasonable?
A simple DIY prewire can make sense when the room is straightforward and the homeowner already knows:
- The final display location
- The exact seating plan
- The speaker configuration
- The rack location
- Required cable ratings
- Cable-routing requirements
- Local building requirements
- How each cable will be tested and terminated
Professional planning becomes more valuable when the room includes:
- Dolby Atmos
- Multiple seating rows
- In-wall speakers
- In-ceiling speakers
- Dual subwoofers
- A projector
- Motorized projection screen
- Remote AV rack
- Lighting control
- Motorized shades
- Whole-home automation
- Network integration
- Difficult framing
- High-value wall finishes
The reason is not that pulling wire is mysterious.
The hard part is knowing where the wire should end before the room exists.
Why the Prewire Window Matters in Marin and Novato Homes
A home theater in Marin County may be part of a new custom home, an older-home remodel, a family-room conversion, or a larger whole-home technology project.
Those scenarios create very different wiring needs.
A Mill Valley remodel may have limited access once finished walls go back up.
A large Novato home may need the theater planned together with the wired network and WiFi system.
A Tiburon entertainment room with large windows may need display choice, shades, and lighting discussed together.
The local lesson is not that every Marin home needs the same wiring package.
It is the opposite.
The room and construction plan should decide the prewire.
Home Cinema Center serves Novato, Marin County, and surrounding North Bay communities with home theater, networking, audio, automation, and installation services.
Final Thoughts: Drywall Should Be the Last Step, Not the Design Deadline
A smart home theater prewire does not mean filling every wall with extra cable.
It means making the hard decisions while changing them is still easy.
Choose the screen.
Fix the seating.
Design the speaker layout.
Plan the subwoofers.
Choose the rack location.
Run the network.
Coordinate power.
Add replacement paths.
Label and test everything.
Then take photos.
After that, let the drywall crew close the walls.

If your framing is open now, contact Home Cinema Center before the rough-in window disappears. A local prewire review can help you settle the home theater, networking, display, speaker, control, and equipment-location decisions while you still have access to the structure.
Frequently Asked Questions
What wires should I run for a home theater before drywall?
Most home theater projects need speaker wiring, Ethernet, display or projector signal paths, subwoofer connections, and suitable pathways for future cables. The exact list comes from the system design. Power locations for displays, projectors, powered subwoofers, racks, and motorized equipment should also be coordinated with the electrical plan.
Should I run HDMI through the wall or install conduit?
Installing both the required video cable and a usable conduit path is often the safer approach. HDMI technology changes, cables can fail, and future equipment may require something different. A properly planned conduit gives a later installer a route between the rack and display without reopening the finished wall.
What speaker wire should I use for home theater prewire?
Use in-wall-rated speaker cable selected for the speaker load, run length, amplifier, installation method, and applicable requirements. 14/2 and 16/2 copper cables are common in residential systems, but the correct specification should come from the actual system rather than a generic room-size rule.
How should I prewire for Dolby Atmos?
Choose your seating and Dolby Atmos configuration first, then run cables to speaker positions based on that geometry. A 5.1.4 layout requires four height channels, while a 7.1.4 layout combines seven ear-level channels with four height channels. Dolby publishes current placement diagrams for both planning and installation.
Should I run Cat6 or Cat6A to a home theater?
Both can be suitable. Cat6A supports 10GBASE-T to 100 meters according to current cabling specifications, but it is physically larger and may be unnecessary for some residential runs. Choose the category based on the home network design, run length, equipment needs, pathway space, and long-term plan.
Should I prewire for two subwoofers?
Running signal options to two or more practical locations can give you more freedom when the room is calibrated. Bass performance depends heavily on room geometry and seating, so the position that looks best on the floor plan may not be the position that sounds best after construction.
What should be run to a ceiling-mounted projector?
A projector location may need power, video, Ethernet, control wiring, a replacement conduit, and suitable mounting support. The exact requirements depend on projector model, distance from the rack, screen type, control system, and signal-distribution method. Those decisions should be made before the ceiling closes.
Where should the home theater equipment rack go?
Choose a dry, ventilated, serviceable location that can receive the speaker, network, video, control, and power connections required by the system. The rack can be hidden from the theater, but technicians still need access and the electronics still need enough airflow to manage heat.
Is professional home theater prewire worth it?
Professional planning becomes particularly valuable when the project includes Atmos, a projector, in-wall speakers, multiple subwoofers, an equipment rack, lighting control, networking, or automation. The main value comes from coordinating the room before construction removes easy access, not simply from paying someone to pull cable.
When should I contact a home theater installer during construction?
Contact the installer while plans and framing can still change and before low-voltage rough-in and drywall are complete. That gives the designer time to coordinate the screen, seating, speakers, rack, networking, conduit, blocking, power locations, lighting, shades, and control system with the builder and other trades.